*This article was originally created by Prit. All the photos and content are authorized by Prit. Many thanks to him for sharing such great content and stunning pictures with us!
I was looking to replace & upgrade my stock 9005/HB3 halogen bulbs in my 2013 Acura TSX with something a little brighter, hence opted for an LED alternative. In this car, the 9005 bulbs serve as both the DRL and high beams
First Impressions of Lasfit 9005/HB3 LED Bulbs
After expressing what I was looking for to Lasfit customer service, Hank, I was recommended to try the LAair 9005 bulbs. I ordered the bulbs & received my package in just two days after placing the order, quicker than the estimated 3-6 day shipping provided by Lasfit customer service. The delivery was fast. The bulbs were packaged in a pouch & box with Lasfit branding, like shown below.
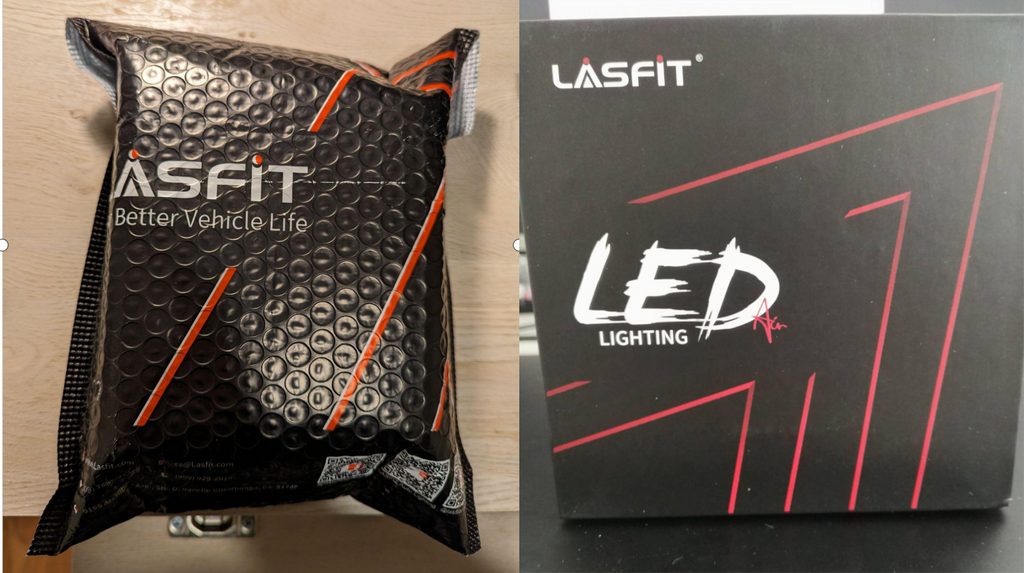 Outside Packaging & Box
Inside the box was a pair of non-static white gloves, a product manual, two LED bulbs, and an extra pair of O-rings. I thought the overall packaging configuration was good as the bulbs were snug in the foam cutout, avoiding or minimizing any chance of damage to the product. My initial thoughts were the bulbs were well-constructed.
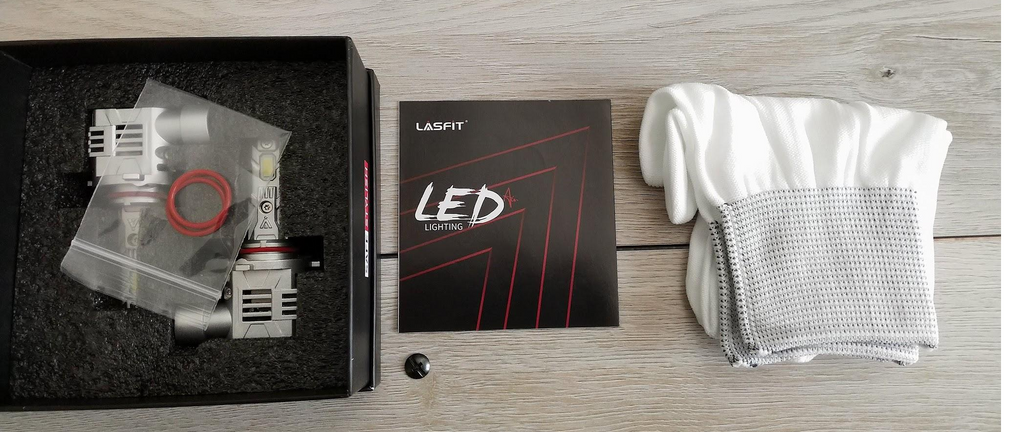
LAair 9005 LED Bulb
Installation Process
The DRL(9005) bulbs are located next to the projector headlights on this car as shown in image below(stock bulb on driver’s side shown)
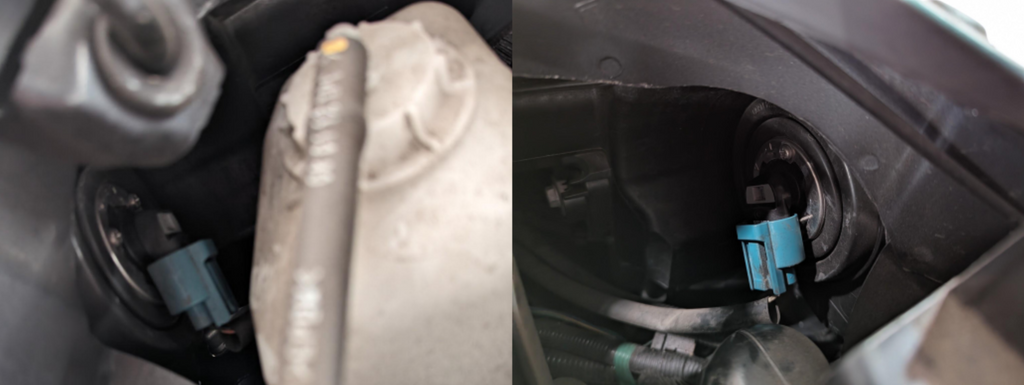
The installation of the LED bulbs was as follows:
1.Removed the blue connector from the bulb by pushing the tab(shown w/ red arrow) and pulling down
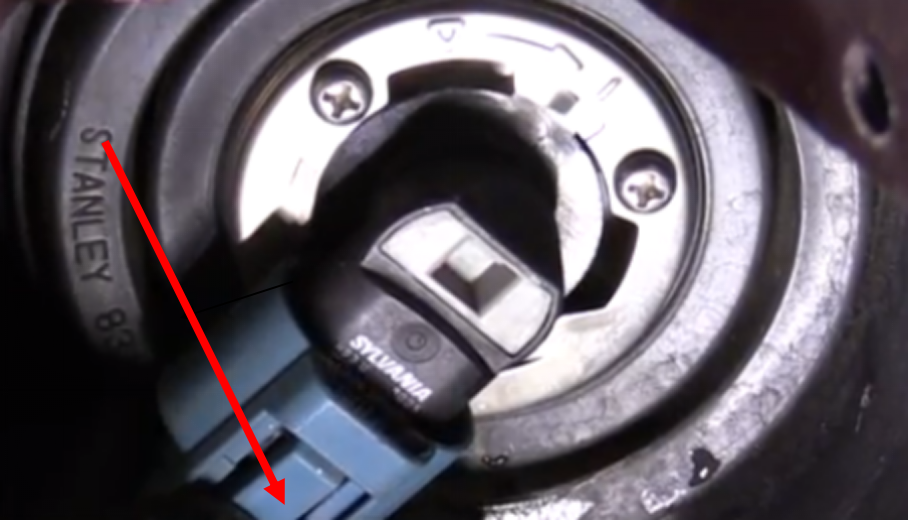
2.Removed the stock bulb assembly from the lens by twisting it counterclockwise. Image shows bulb assembly pulled out of the lens.
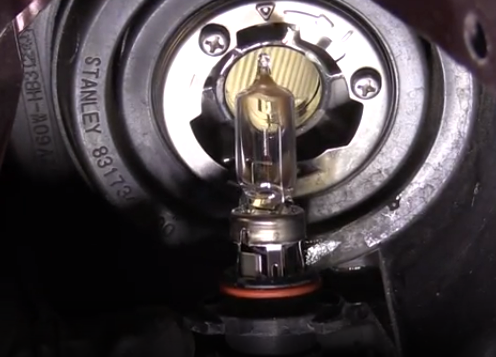
3. Placed the LED bulb assembly into the lens and twisted counterclockwise to lock into place. Connected the blue connector to bulb assembly
Useful tip: To get the LAair 9005 bulb to be in the 3 and 9 o'clock position(optimal light pattern), the connector should be at the 12 o’clock position. Below images show position of blue connector(at 12 o’clock position) & final locked position of LED bulb in the lens.
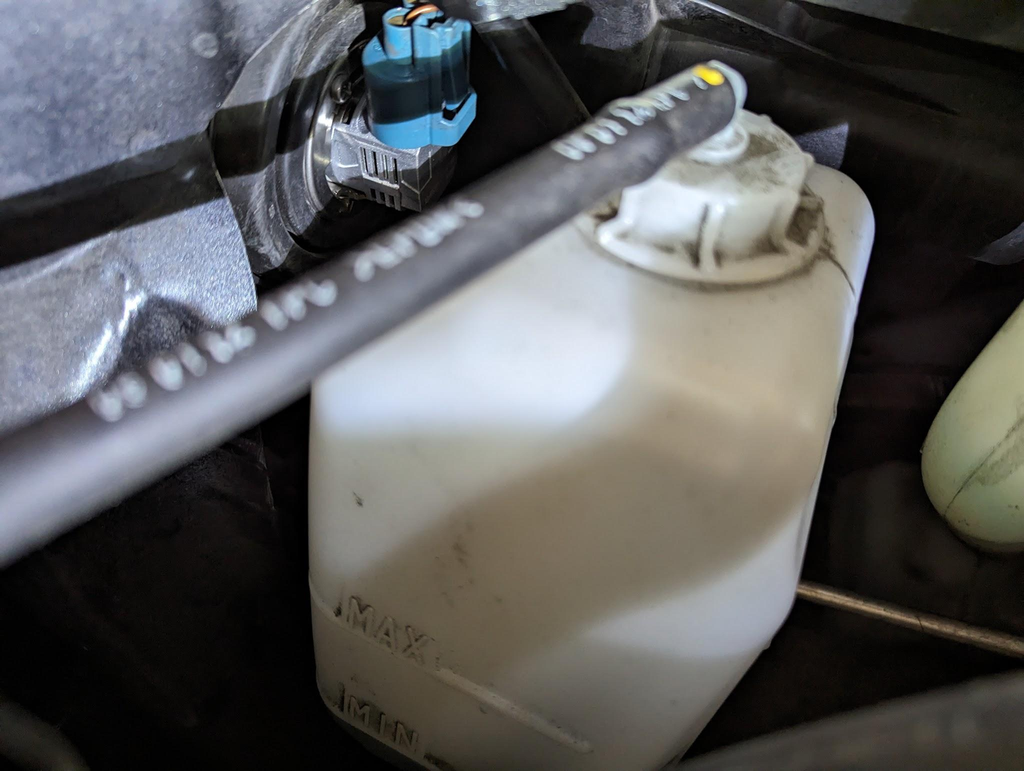
LED bulb with connector at 12’o clock position
Overall I found the installation process to be not that difficult. The bulbs were easy to access, albeit in tight space. Access to the passenger side was a little more of a challenge. For those with larger hands, the white reservoir tank may need to be removed to have more space to work with, but this is optional. For my installation, I did not have to move the tank. The factory stock bulbs were able to be removed from the lens with no issue. Same for the installation of the LED bulbs. No tooling was required for the installation, and gloves were worn.
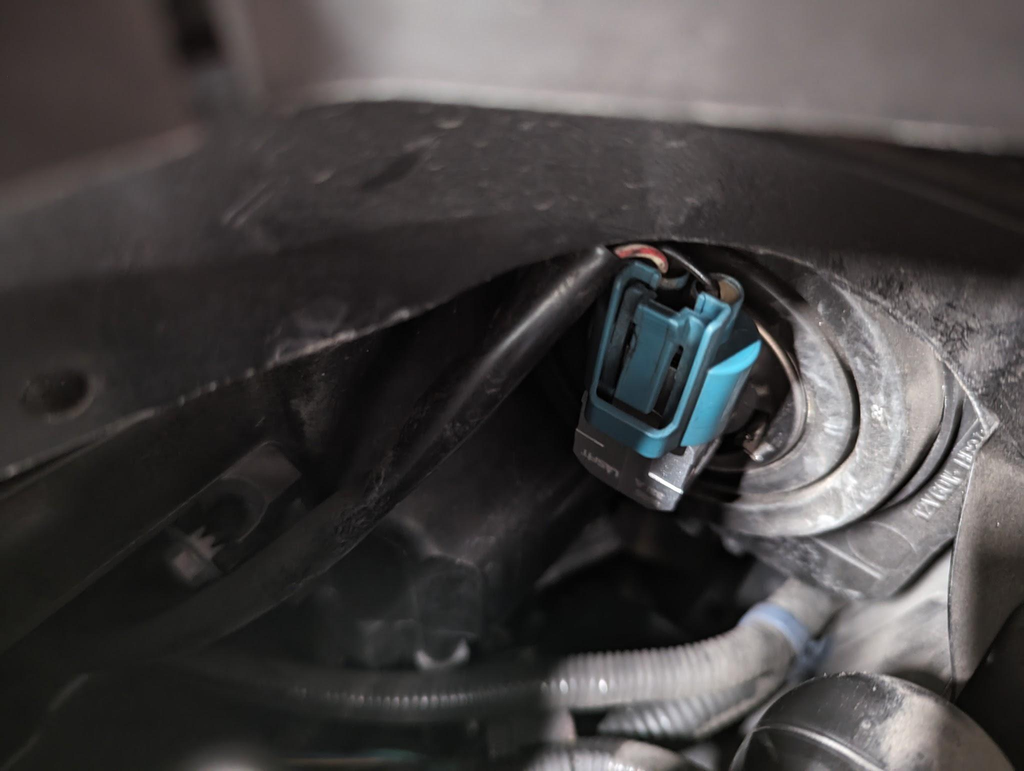
After completing this installation, I did not receive any “Check DRL system” or warning lights on the dash. However, I did encounter an issue with the LED lights flickering when using them as DRL. High beams worked fine. I reached out to Lasfit regarding this issue and they shipped me canbus decoders at no charge. Unfortunately due to several factors including tight installation space, position of the LED bulb connector(as shown below), size of the decoder connectors, it was not possible to connect the decoders to the bulb.
I was able to return the LAair bulbs to Lasfit and worked with Hank to try another 9005 HB3 bulbs, LAplus 9005, which had the connector separate from the bulb and would work better based on the layout & location of the DRL for my car. I received the new bulbs within a day or two after our communication. Inside the box were the bulbs, product manual, and three stickers.
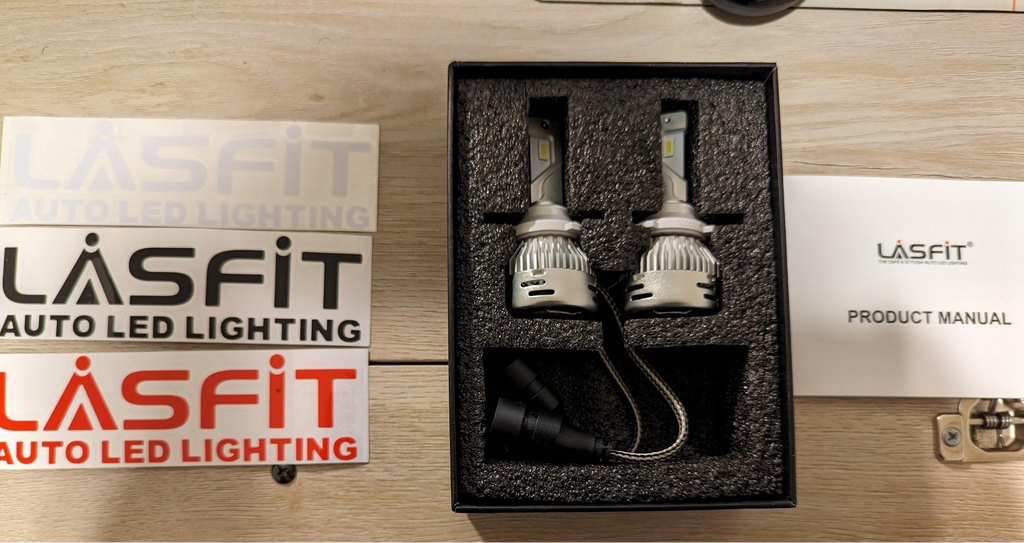
My initial impression of these bulbs was that I liked that it had the 360 adjustable socket feature to give the user the freedom to adjust the beam pasttern and like mentioned above, the socket separate from the rest of the bulb for extra flexibility. One thing I had encountered during the installation was after putting the tabs into the final lock position, the LED bulbs would not be at the 3 and 9 o'clock position, instead were at a slight angle. When attempting to orient the bulb to the desired position, this required having to turn the bulb or socket counterclockwise, however this would result in the tabs on the white plastic mounting bracket sliding out of their lock position and the bulb felt loose in the lens assembly.
With the LAplus LED bulbs, I also encountered the LED flickering issue when installing the bulb directly to the car’s blue connector. I installed the canbus decoders with one connector to the LED bulb connector(red arrow) and the other connected to the blue connector from the car(blue arrow), however this did not resolve the flickering issue when using it as DRL.
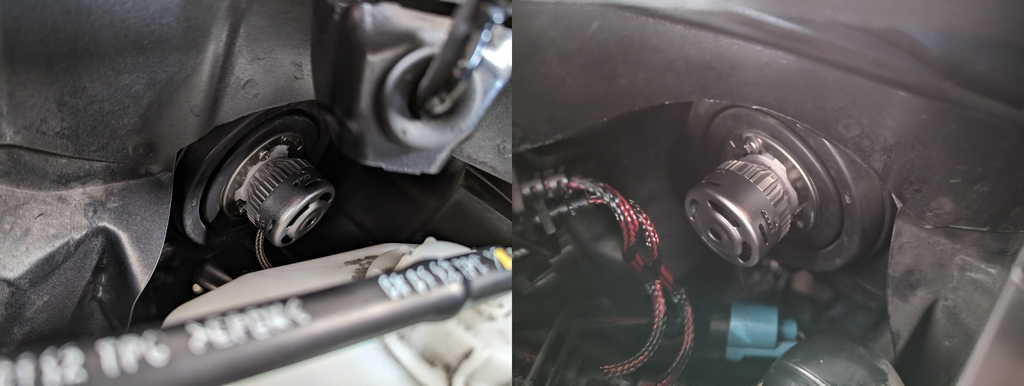
LAplus 9005 install, Passenger side(L), Driver’s side(R)
Before and After Comparison
The images below show the stock halogen DRL’s, after installation of the LasFIT LED’s, and comparison of the two. From a brightness performance standpoint, both LED bulbs are indeed much brighter than the stock halogen bulb.
From Brightness Perspective:
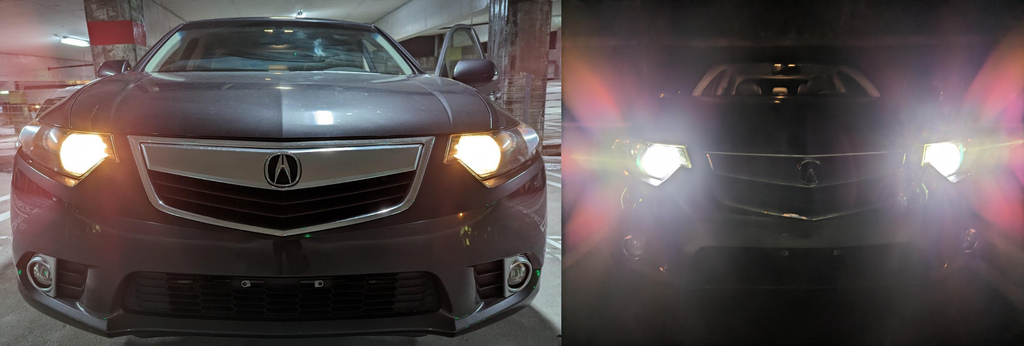
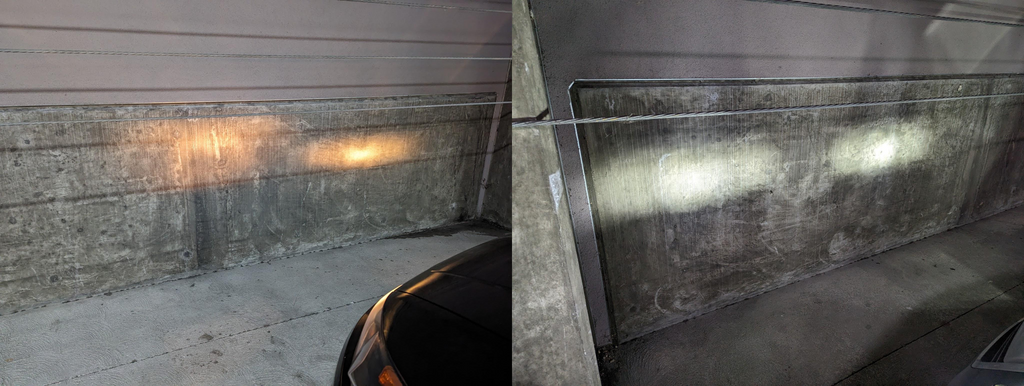
Stock halogen bulb & LAair 9005 LED
Stock Halogen Bulb & LasFIT LED bulbs
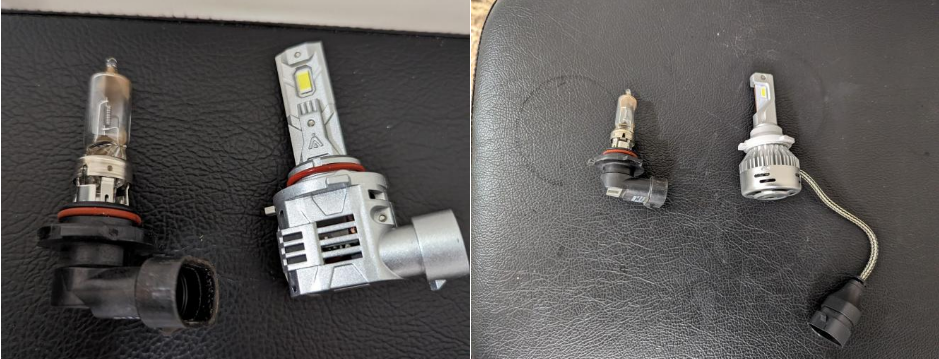
Stock bulb, LAair 9005, LAplus9005
Review & Final Thoughts
I was satisfied with the brightness output that both the LAair and LAplus bulbs offered. However, the flickering issue remained despite trying different solutions, so I was not able to use them as DRL’s in my car.
The installation process was pretty straightforward for both bulbs. For the issue I encountered with the LAplus installation, perhaps the use of a more rigid material for the mounting base/tabs that more closely mimics the material of the mounting base used on the factory bulbs, and/or having a design where the user can position the tabs relative to LED bulb (with say a set screw) prior to inserting into the lens would help with locking the bulb into the assembly. This may help to ensure that the LED bulbs are securely fastened to the lens and won't come loose.
Lasfit customer service was patient and helpful throughout the whole process from ordering, talking through the issues, & understanding of the situation when the bulbs didn’t work out.
💭Questions or Comments? Leave them below!

